
1. Perfect Your Main Image: The Digital Handshake
Your main image is the single most important visual asset on your Amazon listing. It’s the first impression, the digital handshake with a potential customer. Getting it right is non-negotiable, and Amazon has strict rules to ensure a clean, consistent user experience.
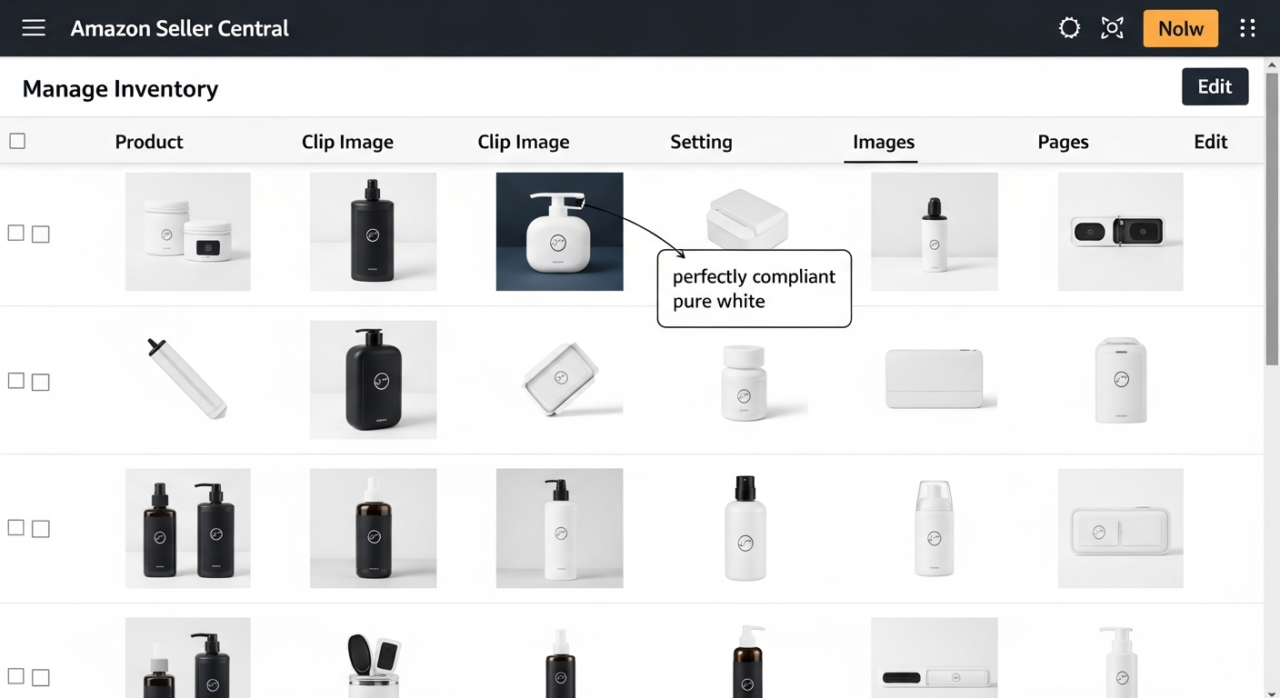
First and foremost, your main image must have a pure white background. This isn’t off-white or light gray; it must be RGB (255, 255, 255). This standard ensures your product pops and blends seamlessly with the Amazon search results page.

Next, focus on the product itself. It must fill at least 85% of the total image frame. This makes your product appear large and detailed, preventing it from getting lost in a sea of white space.
Finally, keep it clean. The main image must be a professional photograph of only the product being sold. Amazon strictly prohibits adding:
- Text, logos, watermarks, or any inset graphics.
- Illustrations or digital mockups.
- Accessories or props that are not included with the purchase.
- Promotional badges like “Sale,” “Made in USA,” or pricing information.
Think of the main image as a sterile, studio shot. Its only job is to show the customer exactly what they are buying, without any distractions.
2. Get the Technical Details Right
An image that looks great but fails to meet Amazon’s technical specifications is an image that won’t work. Adhering to these technical rules is crucial for both compliance and performance.
For file formats, you can use JPEG, PNG, GIF, or TIFF. However, Amazon’s preferred and most commonly used format is JPEG (.jpg), as it offers the best balance of quality and file size for the web.
Image size is where many sellers miss a key opportunity. While the absolute minimum size is 500 pixels on the longest side, this is not the number you should aim for. To enable Amazon’s powerful zoom feature—a proven conversion booster—your image must be at least 1,000 pixels on its longest side. This allows customers to hover and inspect the details of your product, increasing their buying confidence. The maximum allowable size is 10,000 pixels on the longest side.

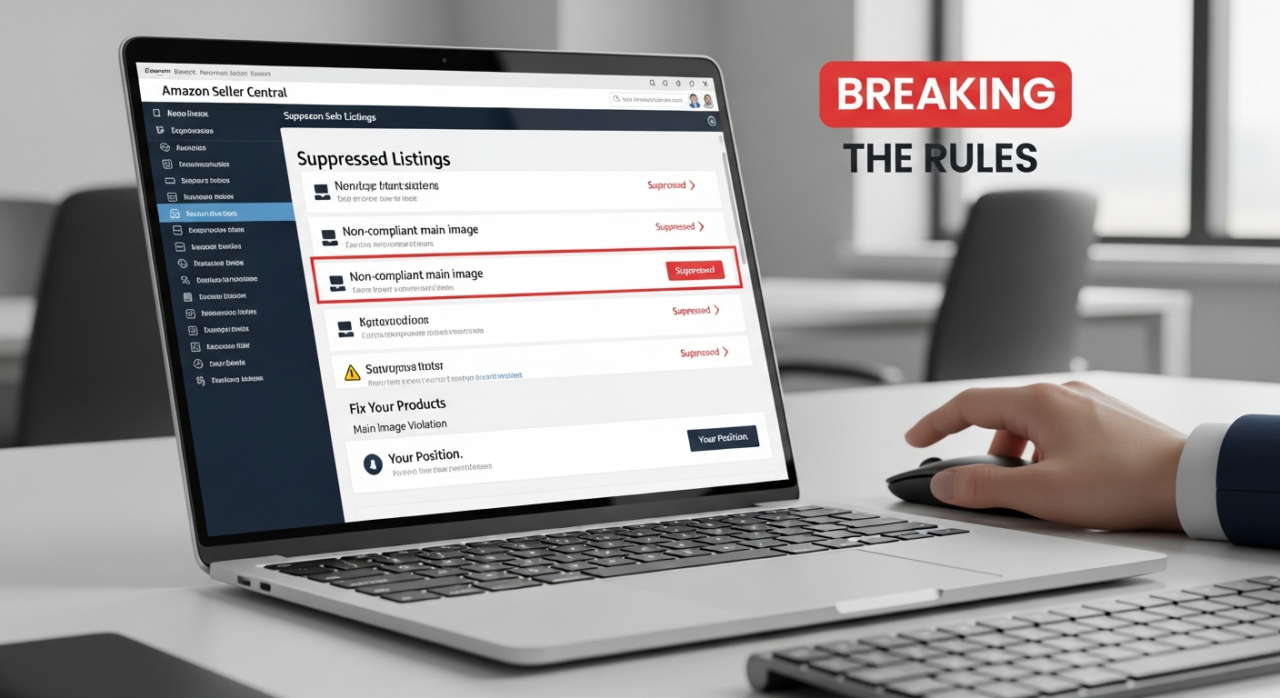
3. Avoid the Dreaded Listing Suppression
What happens if you ignore these rules? Your listing doesn’t get a warning email; it simply disappears. Amazon uses sophisticated automated systems, or “bots,” that constantly scan listings for compliance. If your main image violates a rule, such as having a non-white background or forbidden text, the system will automatically suppress your listing.
Suppression means your product is removed from search results and category browsing. A customer can no longer find your product unless they have a direct link. For all intents and purposes, your product is invisible. To find and fix these issues, regularly check the “Fix Your Products” page within your Seller Central dashboard. This is your primary alert system for any compliance-related problems, including image violations.
4. Navigate the On-Packaging Branding Gray Area
Sellers often ask about a perceived loophole: “Can I put my logo or key features on my product’s packaging and then take a picture of that for the main image?” This is a significant gray area.
On one hand, Amazon requires a professional photograph of the product being sold. If the product is sold in its branded packaging, a photo of that package is technically accurate. However, Amazon’s guidelines also state that main images should show the product *outside* of its packaging, unless the box itself is a critical feature.
Attempting to cram your packaging with marketing text and logos to circumvent the “no text on image” rule is a risky strategy. Amazon’s bots and human reviewers may still flag this as a policy violation, leading to the suppression you’re trying to avoid. The safest path is always to show the product itself, clean and unboxed, on a pure white background.
5. Manage Your Images Like a Pro in Seller Central
Effectively managing your images is simple once you know where to look. While you might hear terms like “Item Image Manager,” the actual tools are integrated directly into your Seller Central workflow.
For uploading and managing images for multiple products at once, navigate to the “Catalog” tab and select “Upload Images.” This tool is ideal for bulk operations when launching a new product line or updating several listings.
For individual listings, go to “Manage Inventory,” find the specific product, and click “Edit.” Inside the product listing editor, you will find a dedicated tab for managing your images. This is where you can upload, reorder, and replace images for a single ASIN. Using these tools to promptly fix any flagged image issues is key to maintaining a healthy and visible product listing.

Need Help Growing Your Sales?
We are here to help you scale.
Note: Include the buttons at the bottom by using this “Custom HTML”(Here)
Written By: Liezel Felisilda
📺 YouTube: EHP Consulting Group on YouTube
🎵 TikTok: EHP Consulting Group on TikTok
Email: [email protected]
Website: www.ehpconsultinggroup.com
Number: 925-293-3313
Date Written: January 16, 2026